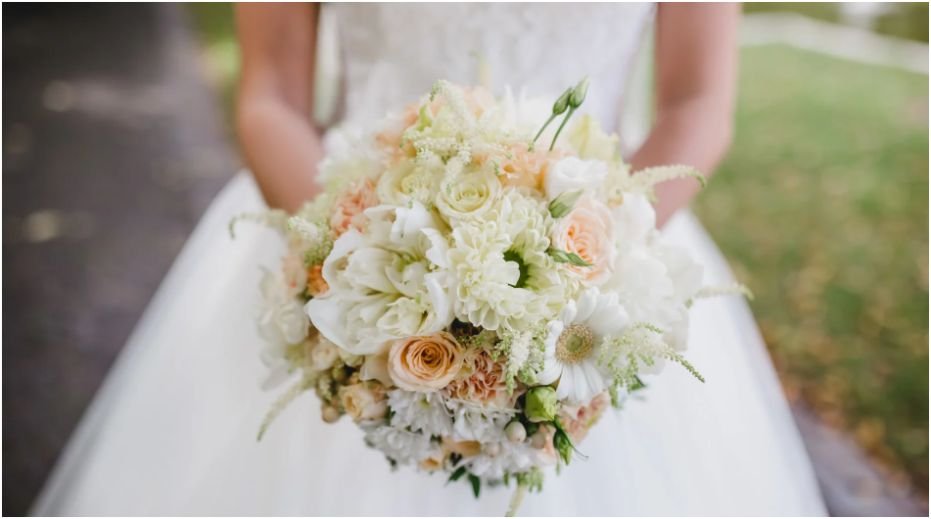
The bouquet looks perfect for one day, then suddenly the clock starts ticking. When brides ask me how to preserve wedding bouquet after wedding, I always say the same thing first: start before the flowers begin looking tired.
A wedding bouquet is not just a bunch of pretty stems. It carries the color palette, the season, the walk down the aisle, and often a few flowers chosen for meaning. That is why I never treat preservation as an afterthought. The method you choose should match the flowers, the display style, and how much work you want to do at home.
Save the Bouquet First: What I Do in the First 24 Hours
The first 24 to 48 hours matter more than most people think. Fresh flowers keep releasing moisture, and moisture is what leads to browning, limp petals, mold, and rot. If you plan to preserve your bouquet, do not leave it in the car, on a sunny kitchen counter, or near a heating vent after the reception.
Trim, Hydrate, and Cool the Flowers
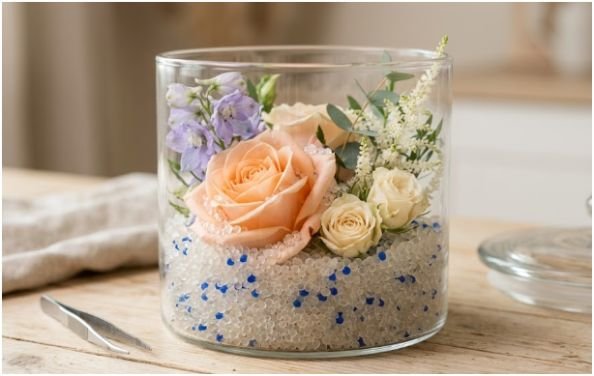
I start by trimming the stems at an angle, then placing the bouquet in clean water. The angled cut helps the stems drink better. Next, I keep the vase in a cool, dark room away from direct sunlight.
This simple step buys you time. It keeps the petals firmer while you decide whether to press, dry, frame, cast, or send the bouquet to a professional.
Separate Damaged Blooms Before They Spread Moisture
One crushed rose or bruised peony can spoil the look of the whole keepsake. I remove damaged petals, soggy leaves, and any greenery sitting below the waterline. Wet foliage breaks down quickly and can make the bouquet smell musty.
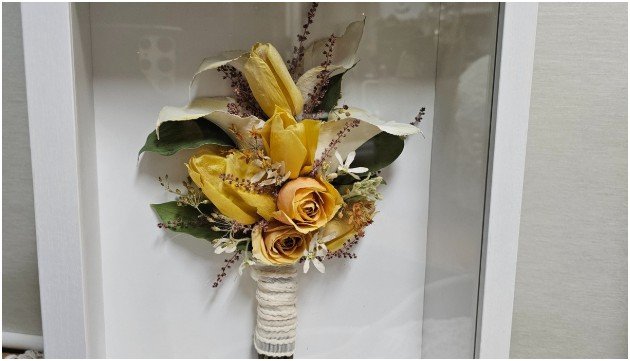
If the bouquet includes ribbon, charms, or lace, remove them before drying. Save those pieces separately. They look beautiful later in a shadow box beside the flowers.
Choose the Right Bouquet Preservation Method
There is no single best method for every bouquet. The right choice depends on whether you want the flowers flat, full, rustic, modern, or professionally finished.
Silica Gel Drying for Color and Shape
Silica gel is one of my favorite DIY methods because it helps flowers keep their three-dimensional shape. It works especially well for roses, ranunculus, dahlias, and small focal blooms.
Pour about an inch of silica gel into an airtight container. Trim the flower stems short, then place the blooms face up or sideways. Slowly pour more silica gel around and over the petals until the flowers are fully covered. Seal the container tightly.
Most flowers dry in one to two weeks. Once dry, remove them gently with a soft brush. The petals will feel fragile, so avoid rushing this step.
Silica gel is best when you want to arrange the blooms inside a deep shadow box. It keeps more shape than air-drying and more depth than pressing.
Flower Pressing for Framed Wall Art
Flower pressing is the best option when you want a clean, flat keepsake. It works beautifully for thinner blooms, greenery, baby’s breath, petals, and small accent flowers.
Take the bouquet apart and choose the healthiest flowers. Place them between sheets of parchment paper or wax paper. Then tuck them inside a heavy book and add more books on top.
Leave the flowers undisturbed for two to four weeks. Do not keep checking them every day. Every time you open the press, you risk shifting the petals.
Pressed flowers look elegant in a glass-on-glass frame. I also like adding a small printed wedding date or a tiny ribbon from the bouquet. If your flowers were chosen for symbolism, this is a natural place to connect readers to bridal bouquet flower meanings for weddings.
Traditional Air-Drying for a Rustic Keepsake
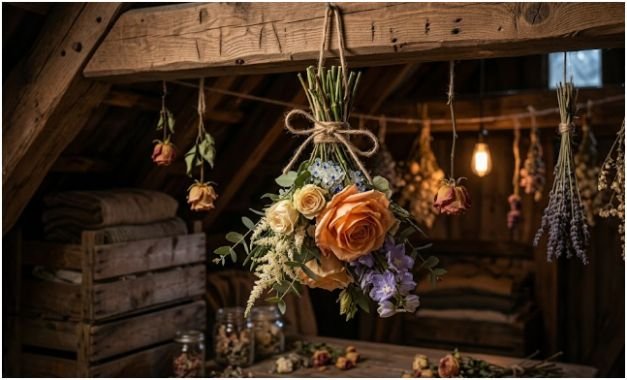
Air-drying is the easiest method and needs almost no special supplies. It gives the bouquet a vintage, slightly muted look. This method works well for roses, lavender, eucalyptus, strawflower, statice, and baby’s breath.
Remove damaged leaves and tie the stems tightly with twine or a rubber band. Hang the bouquet upside down in a dark, dry, well-ventilated room. A closet, spare room, or attic can work if it is not humid.
Let the bouquet hang for two to four weeks. When the petals feel dry and brittle, it is ready.
Air-drying does change the bouquet’s color. White flowers may turn cream. Pink flowers may deepen. Greenery may fade to sage or olive. I see this as part of the charm, not a flaw.
Epoxy Resin Casting for a Modern Display
Resin casting gives the bouquet a polished, modern look. Dried flowers can be set inside clear resin blocks, trays, ring holders, bookends, ornaments, or monogram letters.
The key rule is simple: never put fresh flowers directly into resin. They must be completely dry first. If moisture stays inside the petals, the flowers can brown, rot, or create cloudy spots.
For best results, dry the flowers with silica gel first. Then place them inside a silicone mold and pour deep-pour epoxy resin in slow layers. Each layer needs time to cure, usually around 24 hours, depending on the product.
Resin is beautiful, but it is not the easiest beginner project. It needs ventilation, protective gloves, careful measuring, and patience. Many couples choose a professional resin artist because one mistake can trap bubbles or ruin the arrangement.
Professional Freeze-Drying for Delicate Bouquets
Freeze-drying is often the most realistic-looking preservation option. It removes moisture while helping flowers keep more of their original shape and color. This method is especially useful for delicate blooms, large bouquets, and couples who want a premium keepsake.
The downside is cost and timing. You usually need to book a professional soon after the wedding. Some preservation studios ask couples to ship or drop off the bouquet within a few days.
If your bouquet includes expensive flowers like orchids, garden roses, peonies, or anemones, professional preservation may be worth it.
My Bouquet Method Match: What Works Best for Each Flower
When I decide how to preserve wedding bouquet after wedding, I look at the flower’s thickness first. Thick, moisture-heavy flowers need faster drying. Thin flowers press better. Sturdy flowers handle air-drying.
Roses are flexible. They work with silica gel, air-drying, resin, and shadow boxes. Peonies look stunning but bruise easily, so silica gel or professional preservation is safer. Hydrangeas can air-dry well if they are already slightly mature, but very fresh hydrangeas may wilt before drying cleanly.
Baby’s breath is one of the easiest flowers to save. It air-dries beautifully and also presses well. Eucalyptus keeps its shape and scent better than many greens, making it perfect for rustic arrangements. Orchids and lilies are more delicate, so I would not use them for a casual first-time DIY resin project.
Here is my practical rule: if the flower feels soft, juicy, or thick, dry it with support. If it feels thin and papery, press it. If it has a strong stem and smaller bloom, air-dry it.
A worked example helps. If a bouquet has white roses, blush peonies, baby’s breath, and eucalyptus, I would dry the roses in silica gel, press a few peony petals, air-dry the baby’s breath, and save the eucalyptus for a shadow box border. This gives the final keepsake more texture and less risk.
How to Display a Preserved Wedding Bouquet Without Ruining It
Preservation does not end when the flowers dry. The display matters just as much.
Shadow Boxes, Floating Frames, Vases, and Resin Blocks
A shadow box works best for silica-dried flowers because it gives them space. A floating frame works best for pressed flowers. A ceramic vase suits an air-dried bouquet. Resin blocks look best when you want a modern keepsake for a shelf, desk, or mantel.
I prefer shadow boxes for mixed bouquets because they let you include more than flowers. You can add ribbon, a vow card, invitation paper, lace, or a small photo. It turns the bouquet into a story, not just decor.
Humidity, Sunlight, and Pest Protection
Dried flowers hate moisture. Keep them away from bathrooms, damp basements, laundry rooms, and humid windowsills. High humidity can invite mold and pests.
Sunlight is another quiet problem. Direct UV light fades petals over time, especially pink, purple, blue, and red flowers. Place preserved flowers away from bright windows or choose UV-protective glass for framed pieces.
If you press flowers at home and suspect tiny insects, seal the dried flowers in a plastic bag and place them in the freezer for 24 hours before framing. This extra step can protect your keepsake before it goes behind glass.
FAQs About Preserving a Wedding Bouquet
1. How soon should I preserve my wedding bouquet after the wedding?
Start within 24 to 48 hours, while the flowers still have structure, color, and freshness.
2. What is the easiest way to preserve a wedding bouquet at home?
Air-drying is the easiest DIY method because it only needs twine, a dark room, and patience.
3. Can I put fresh wedding flowers directly into resin?
No, fresh flowers must be fully dried first, or trapped moisture can cause browning, rot, and cloudy resin.
4. What is the best method for keeping bouquet color?
Silica gel drying usually keeps better color and shape than traditional air-drying.
Final Petal Talk: Don’t Let the Bouquet Become a Memory Too Soon
Your bouquet already did its big job. It walked with you, framed your photos, matched your dress, and survived the happy chaos. Now it deserves a second life.
If you want the safest DIY route, choose silica gel for the best mix of color and shape. If you want easy charm, hang it upside down. If you want art, press it. If you want a glossy keepsake, try resin or hire a preservation artist.
The real secret behind how to preserve wedding bouquet after wedding is not fancy equipment. It is timing. Save it early, dry it fully, display it wisely, and your wedding flowers will keep telling the story long after the cake is gone.